A blog to share things that make my life good. Growing avocado plant, ad network, Apple iOS apps, travel and technology gadgets.
Wednesday, 11 March 2015
Time to prune my third avocado plant
I had pruned the 3rd avocado plant two months ago. The pruned area has grown 5 leaves and now new leaves are emerging. I think I will prune away the top leaves and monitor its progress.
Sunday, 22 February 2015
Planting avocado seedling - My 4th and 5th avocado plants
Following my posts in this blog and SG My Garden Is Good blog, you can tell when the avocado seedlings need to be planted into the soil. But I have seen in the internet that people use just water and the plants grow quite well.
The first avocado seedling that I have planted last year did not make it because I have missed the time to plant it. But wait, maybe it is because I have planted it in the soil that makes it worse and it becomes very small. Or maybe I have planted it into a recycle bottle instead of a proper pot. There are many reasons why the first avocado seedling did not survive. So, lessons learnt. Now I plant my seedlings into proper pots and plant them when they have at least 5 leaves and ready for pruning. However, I don't prune them until they are planted into the soil for a couple of weeks or so.
It is Chinese New Year now and noticed that the second day of Chinese New Year is a good day to plant my 4th and 5th avocado plants. I do not want to wait further because the seedlings may miss the time for planting (that was what I thought).
When I planted my 4th and 5th seedlings, I realized that the 2nd and 3rd seedlings have leaves that turned brown at the tip. I was shocked and quickly googled and found the reason for this. Well, again it could be due to few reasons. The browning of the leaf tip may be due to salt accumulation and under watering. I noticed that for a few times, I had used water directly from the tap without letting the water staged overnight. Could it be due to the Chlorine in the water? I'm not sure and now, I let the water staged overnight or at least for a few hours before I water the plant.
Yesterday, I poured 1.5litres of water into the pots for 2nd and 3rd seedlings. I let the water ran out of the pots and waited till no drop came out from the bottom of the pots. I was trying to flush out the salts accumulated in the soil and hopefully this would remove them. I will monitor for a few weeks to see whether this will improve the leaves browning situation. I will water the plant every two days and to make sure that excess water drips out from the bottom and not to let any water stays in the bottom tray.
After two weeks, I will update whether this method works. Stay tuned!
The first avocado seedling that I have planted last year did not make it because I have missed the time to plant it. But wait, maybe it is because I have planted it in the soil that makes it worse and it becomes very small. Or maybe I have planted it into a recycle bottle instead of a proper pot. There are many reasons why the first avocado seedling did not survive. So, lessons learnt. Now I plant my seedlings into proper pots and plant them when they have at least 5 leaves and ready for pruning. However, I don't prune them until they are planted into the soil for a couple of weeks or so.
It is Chinese New Year now and noticed that the second day of Chinese New Year is a good day to plant my 4th and 5th avocado plants. I do not want to wait further because the seedlings may miss the time for planting (that was what I thought).
When I planted my 4th and 5th seedlings, I realized that the 2nd and 3rd seedlings have leaves that turned brown at the tip. I was shocked and quickly googled and found the reason for this. Well, again it could be due to few reasons. The browning of the leaf tip may be due to salt accumulation and under watering. I noticed that for a few times, I had used water directly from the tap without letting the water staged overnight. Could it be due to the Chlorine in the water? I'm not sure and now, I let the water staged overnight or at least for a few hours before I water the plant.
![]() |
| Leaf tip turning brown |
After two weeks, I will update whether this method works. Stay tuned!
Monday, 16 February 2015
9D8N Taiwan Free & Easy Trip - Day 4 (Cingjing/Taichung) - 2
After a delightful lunch at Dong Dah Steaks, we went back to the Becon Hotel. We checked in and had arranged a taxi to the Lavender Cottage Xinshe (熏衣草森林). It was 3pm and the Lavender Cottage closed at about 6.30pm, so we thought that we could still go and visit the place before it got dark at around 5.30pm.
At 3.40pm, we asked the hotel staff to book a taxi to the Lavender Cottage. At 3.50pm, we boarded the taxi to the Lavender Cottage. We were quoted NT2000 for to and fro the Lavender Cottage. It was actually NT900 to the place but we requested for the taxi driver to bring us back to the Hotel and was quoted NT2000 for the round trip. It was quite a scary ride as the roads to the Lavender Cottage were very narrow (only one vehicle is able to pass) and the taxi driver was driving very fast.
We reached the place at 4.55pm (about 1 hour journey). We bought the tickets, NT100 per pax but came with NT50 x 2 vouchers which could be redeemed with purchase. We bought 2 ice-creams at NT50 each.
At 5.45pm, it was getting dark and we took a break at the restaurant. We ordered a waffle and two drinks. The shops and restaurants in the cottage farm will close at 6.30pm. We had our desserts and went to the shop.
At 6.15pm, it was completely dark. We made our way back to Hotel in the taxi. It was not as scary because at night, you could tell whether there were cars coming by the headlights from the approaching vehicles.
At 7.20pm, we reached our Hotel.
At 8.15pm, we went to Fengjia for dinner and then continued shopping... The Fengjia night market is just right beside our hotel. It is also near to the Fengjia university. As it is near to the university, you can see a lot of young people gathered in this night market. There are many food that you can try and things that you can bargain and buy. But try to be nice when you are bargaining, you will get better discount.
Fried mushroom was our favourite. It was healthy and not so oily. You must try this and you may get addicted to the taste. Try to eat them while they are still hot. When they are cold, the taste is not so great.
The lazy people shrimps/prawns were quite popular some times ago. The shrimps were grilled and you didn't have to remove the shells to eat them. I didn't try them as I was quite full from eating other food.
You can also find pork knuckle here. I was thinking of buying one but again, I was too full.
This queue was for the 大肠包小肠. There were two stalls that claimed that they are the first original vendor. I just joined the queue that was fast-moving as I didn't want to waste my time queuing up. I guessed both tastes should be almost the same and I bet that I wouldn't be able to tell the difference.
This is quite filling and I recommend that you try this last or share with your friends or family members. Unless you are very hungry, you should be able to eat it by yourself.
There are many shops that you can find discounted prices. The shoes are quite nice here but I don't think they can last. We bought some shoes but they wouldn't last in our climate.
There are many cute helmets here. You can buy one for your children when you are riding a bicycle.
At midnight, we went back to Hotel. More exciting journey ahead, visit Day 5.
At 3.40pm, we asked the hotel staff to book a taxi to the Lavender Cottage. At 3.50pm, we boarded the taxi to the Lavender Cottage. We were quoted NT2000 for to and fro the Lavender Cottage. It was actually NT900 to the place but we requested for the taxi driver to bring us back to the Hotel and was quoted NT2000 for the round trip. It was quite a scary ride as the roads to the Lavender Cottage were very narrow (only one vehicle is able to pass) and the taxi driver was driving very fast.
We reached the place at 4.55pm (about 1 hour journey). We bought the tickets, NT100 per pax but came with NT50 x 2 vouchers which could be redeemed with purchase. We bought 2 ice-creams at NT50 each.
![]() |
| Entrance Ticket |
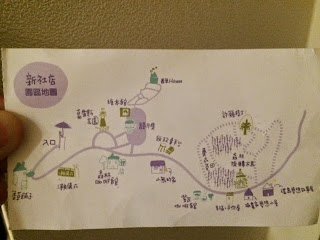
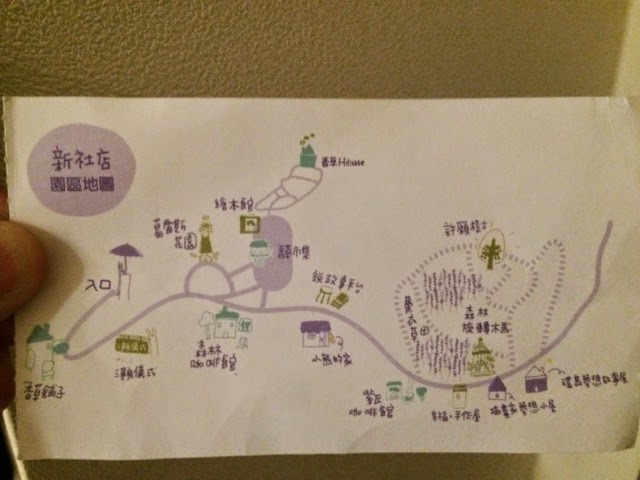
![]() |
| Small map on the back of the ticket |
![]() |
| Entrance of Lavender Cottage |
![]() |
| A quick guide |
![]() |
| Want to post something? |
![]() |
| Soaps and souvenirs |
![]() |
| Can't remember what this shop is selling... |
![]() |
| Desserts |
At 7.20pm, we reached our Hotel.
At 8.15pm, we went to Fengjia for dinner and then continued shopping... The Fengjia night market is just right beside our hotel. It is also near to the Fengjia university. As it is near to the university, you can see a lot of young people gathered in this night market. There are many food that you can try and things that you can bargain and buy. But try to be nice when you are bargaining, you will get better discount.
![]() |
| Feng Jia Night Market |
| Papaya Milk drink |
![]() |
| Grilled Cuttlefish |
![]() |
| Fried Mushroom and vegetable |
![]() |
| Lazy people shrimps |
![]() |
| Pork knuckle |
![]() |
| Red eye roll beef |
| Scallop |
![]() |
| Grilled Scallop |
| Shopping at Fengjia Night Market |
This queue was for the 大肠包小肠. There were two stalls that claimed that they are the first original vendor. I just joined the queue that was fast-moving as I didn't want to waste my time queuing up. I guessed both tastes should be almost the same and I bet that I wouldn't be able to tell the difference.
| Queuing up for 大肠包小肠 |
| 大肠包小肠 |
This is quite filling and I recommend that you try this last or share with your friends or family members. Unless you are very hungry, you should be able to eat it by yourself.
![]() |
| 大肠包小肠 |
![]() |
| Grilled snails |
| Shopping |
There are many cute helmets here. You can buy one for your children when you are riding a bicycle.
![]() |
| Cute helmets |
![]() |
| Wall stickers |
| Cute puppy |
![]() |
| Dessert shop |
Saturday, 7 February 2015
Apple iOS 8.1.3 software updated successfully!
| iOS 8.1.3 verifying update... |
When you want to update the software, I recommend that you check that you have enough storage space in the iPhone or iPad before performing the update. It is better to charge your devices to 100% battery life before the update. Do it when you don't need the phone or device for the next few hours just in case there are issues during update. I have been using iPhone, iPad for the last 5 years at least and I have never encountered issues during updating. Of course, don't interrupt the process of updating. Leave it there and the OTA system will update the device accordingly. That is why you need to charge it to 100% first before updating. Sometimes, I would leave it with the charger switched on just in case there was any issue.
Remember to backup your data before updating just in case. However, recently, I have not done any major backup and I have not encountered any issues. But like I said, just in case, you probably need to backup the device periodically so that you don't lose your important photos or files.
Wednesday, 4 February 2015
White Apple MacBook 13-inch late 2009 upgraded to Yosemite
If you are wondering whether your old white Apple MacBook 13-inch late 2009 model can be upgraded to Yosemite, then this blog is what you are searching for.
I have this late 2009 13-inch white MacBook. It was a free gift from my broadband contract with the local Telco in 2009. I seldom use this MacBook because it is quite heavy. I only use this for my Xcode programming on my apps. It has been collecting dust since. Recently, my friend wanted to write apps as he had friend who earns about $3K per month and he bought a MacBook Pro. He upgraded his OSX to Yosemite. I said to myself, "why not upgrade my MacBook too?". So, I downloaded the Yosemite OSX from the App Store as it is free if you have purchased at least Snow Leopard before.
I installed the Yosemite over my Snow Leopard as I have softwares which I don't want to re-install. The installation was successful and there is not much lag in the Yosemite on a pretty old machine. I must say that Apple has built good products and my MacBook which is 6 years old is still functioning and the battery life is still good. However, the only flaw is that there is a line running vertical from the top to the bottom of the screen. You can only see it when it is dark or black screen. Well, I can't complain much, it is an old machine and absolutely free.
So, I installed Xcode 6 and told myself that I will start to work on apps building… It is easily said than done… Let's see whether I have the time to do it.
I have this late 2009 13-inch white MacBook. It was a free gift from my broadband contract with the local Telco in 2009. I seldom use this MacBook because it is quite heavy. I only use this for my Xcode programming on my apps. It has been collecting dust since. Recently, my friend wanted to write apps as he had friend who earns about $3K per month and he bought a MacBook Pro. He upgraded his OSX to Yosemite. I said to myself, "why not upgrade my MacBook too?". So, I downloaded the Yosemite OSX from the App Store as it is free if you have purchased at least Snow Leopard before.
![]() |
| OS X Yosemite on MacBook 13-inch, Late 2009 |
So, I installed Xcode 6 and told myself that I will start to work on apps building… It is easily said than done… Let's see whether I have the time to do it.
![]() |
| Installing Yosemite over Snow Leopard |
![]() |
| Yosemite on MacBook late 2009 version |
Saturday, 31 January 2015
Apple iOS 8.1.3 software update
Apple released an iOS 8.1.3 update recently. My advice is to wait for a few days to a week to see the end users' responses to the update before taking the plunge to update it. Well, I have 3 Apple Devices at home and I don't want to risk updating every device before it is 'safe'. However, I think I can take the risk as I have an iPad Air which I can update before I update the rest of my iPhones. I don't think it can address all the issues and bugs but with minor or incremental patches, it should be better than no updates at all.
Tuesday, 27 January 2015
Pitcher plant propagation
I bought a pitcher plant about a year ago. It was quite small and I think it was about $18. I used perlite and peat moss in 1:1 ratio. The plant grew well initially and the pitchers became bigger. I did a research on it and it needed distilled water or rain water. I didn't want to risk it using tap water so I bought bottled distilled drinking water from the supermarket. Sometimes, I tried to collect rain water or just placed the pot in the rain. The tap water may kill the plant. Another thing, his plant needs indirect sunlight to do water and remembered to keep the roots moist. Never let it dried up for more than 2 days, the pitchers will dry up and die. If the conditions are optimum, the pitchers can survive for a few weeks.
You may want to capture some small insects for the pitchers. The peat moss and perlite have not much nutrients for the plant. It relies on the insects that are trapped in the pitchers to provide the additional nutrients it needs. I didn't see insects getting into the pitchers so I manually capture insects and place them in the pitchers. This will help it to grow.
I made a mistake when I transferred the plant to a pot. It seemed that the medium was too packed and there was no air going into the medium. The plant started to dry up and slowly dying. I needed to save the plant. So, I cut the plant into two portions which each portion having at least three leaves. I scrapped the end of the stem with a scissor and dipped into root hormone powder. Again, I used perlite and peat moss. This time, I used shallow containers. I used a plastic bag to cover it and left it for a month.
After a month, the plant will start to grow new leaves and you will know that the propagation is successful.
New buds will emerge from the crown and soon more leaves will appear. You need to be patient and wait for the leaves to grow. Keep the plant moist all time and it needs indirect sunlight. However, I noticed that the parent pitcher plant had shorter stem intervals between the leaves and thus, it was very difficult to propagate because you would need a certain portion of the stem to be scrapped away on the skin. But it can be done and you just need to be careful and skilful.
Subscribe to:
Posts (Atom)